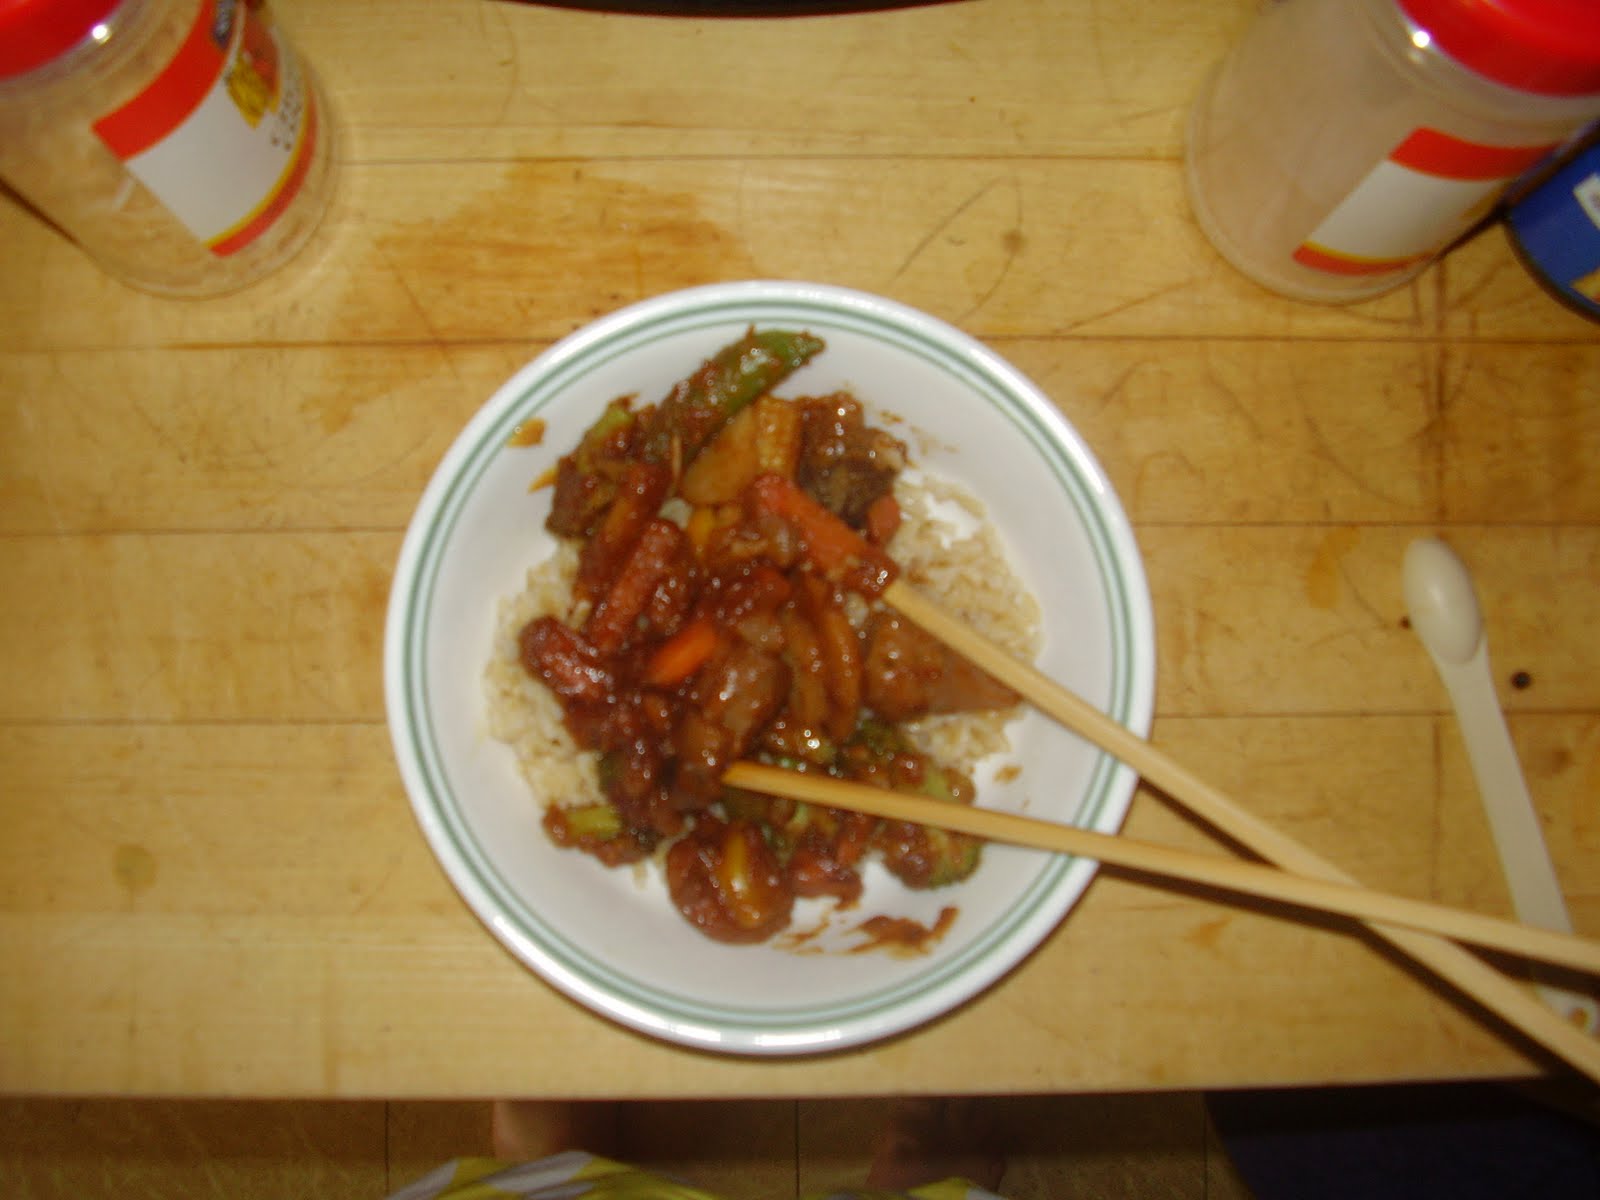
You'll see in my pictures of the dish that I don't have a very high ratio of rice to veggies. I used a serving of rice for one but ended up making enough stir fry for my parents as well. I'm not writing in amounts of the vegetables because in a stir fry you don't need to be exact--put as much as you want.
I love egg in my stir fry but you can easily leave it out to make this vegan and still get plenty of protein from the peanuts.
Spicy Stir Fry
Prep Time: 3 minutes
Cook Time: 10 minutes
Ingredients:
Minute rice
Cooking oil
Garlic
Fresh ginger
Baby corn (canned or frozen)
Water chestnuts (canned)
Bamboo shoots (canned)
Sugar-snap peas (frozen)
Egg (optional)
Peanuts
Soy sauce
Tabasco sauce
1. Cook rice according to directions on package.
2. In a wok or large skillet, heat 2 tablespoons oil over medium heat.
3. Mince garlic and ginger. Saute in oil until garlic becomes translucent.
4. Add frozen vegetables and several shakes of soy sauce. Let simmer until thawed.
5. Add canned vegetables and more soy sauce. Let simmer a couple minutes.
6. Add rice, Tabasco, and more soy sauce.
7. Clear a space near the center of the pan for the egg. Allow to scramble.
8. Add peanuts and serve.
Showing posts with label vegetarian. Show all posts
Thursday, July 19, 2012
Tuesday, July 10, 2012
Stovetop Quesadillas
Ok, repeat after me: Quesadillas from the microwave are not real quesadillas.
Good. Today for lunch I made myself a quesadilla. I used to microwave them until I saw a friend make one on the stove in high school and have never gone back. It doesn't take much longer to cook, the cleaning is minimal, and the texture is much, much better.
Quesadilla with Tomato and Green Onion
Prep time: 4 minutes
Cook time: 5 minutes
Ingredients:
1 green onion
4 cherry tomatoes
2 small flour tortillas
1/2 c. grated 2% cheese
1. Dice the green onion and tomatoes.
2. Lay one tortilla in a frying pan over low heat. Top with cheese and veggies and cook with lid on until cheese starts to melt.
3. Place second tortilla on top of cheese and veggies. Press down to stick to cheese. Flip quesadilla.
4. Increase heat to medium and cook until tortilla on bottom has browned. Flip over and brown the other tortilla.
5. Cut and serve.
Tip: I love topping mine with salsa, especially when I am feeling too lazy to chop veggies and make them with just cheese. Guacamole is also an amazing topping.
Good. Today for lunch I made myself a quesadilla. I used to microwave them until I saw a friend make one on the stove in high school and have never gone back. It doesn't take much longer to cook, the cleaning is minimal, and the texture is much, much better.
Quesadilla with Tomato and Green Onion
Prep time: 4 minutes
Cook time: 5 minutes
Ingredients:
1 green onion
4 cherry tomatoes
2 small flour tortillas
1/2 c. grated 2% cheese
1. Dice the green onion and tomatoes.
2. Lay one tortilla in a frying pan over low heat. Top with cheese and veggies and cook with lid on until cheese starts to melt.
3. Place second tortilla on top of cheese and veggies. Press down to stick to cheese. Flip quesadilla.
4. Increase heat to medium and cook until tortilla on bottom has browned. Flip over and brown the other tortilla.
5. Cut and serve.
Tip: I love topping mine with salsa, especially when I am feeling too lazy to chop veggies and make them with just cheese. Guacamole is also an amazing topping.
Saturday, July 7, 2012
Quick Migas
Migas are one of my favorite breakfasts to cook when friends have spent the night, and with pre-shredded cheese and chunky salsa instead of fresh chopped veggies the prep time is very short. This recipe is a serving for one; just multiply it by the number of people you're feeding.
Quick Migas
Prep time: 5 mins
Cook time: 5 mins
Ingredients:
2 eggs
2 tbsp milk
2 tbsp shredded cheese
2 tbsp chunky salsa
1 handful tortilla chips (broken)
1. Beat the eggs and milk together in a bowl until the color is mostly uniform.
2. Pour egg mixture into a skillet on medium heat.
3. When the eggs start to solidify, add cheese, salsa, and chips. Cook until eggs have finished solidifying.
Tip: When I'm watching my calorie intake, I will often toast a corn tortilla in the toaster oven and use that instead of tortilla chips. It cuts out a few calories since it's baked rather than fried.
Quick Migas
Prep time: 5 mins
Cook time: 5 mins
Ingredients:
2 eggs
2 tbsp milk
2 tbsp shredded cheese
2 tbsp chunky salsa
1 handful tortilla chips (broken)
1. Beat the eggs and milk together in a bowl until the color is mostly uniform.
2. Pour egg mixture into a skillet on medium heat.
3. When the eggs start to solidify, add cheese, salsa, and chips. Cook until eggs have finished solidifying.
Tip: When I'm watching my calorie intake, I will often toast a corn tortilla in the toaster oven and use that instead of tortilla chips. It cuts out a few calories since it's baked rather than fried.
Monday, July 2, 2012
Pasta Primavera
After a VERY long hiatus I am back and hope to start posting on here regularly again.
I made one of my favorite summertime dinners tonight: pasta primavera. It doesn't require standing over the stove (like stir fry or gumbo) and is a good cold dish when I'm not in the mood for a salad. Plus, it's very versatile and good when you need to toss together whatever veggies are in the fridge before they get old.
Pasta Primavera
Cook time: about 12 minutes (depends on the type of pasta you use)
Ingredients:
Whole what noodles
Vegetables (I used artichoke hearts, olives, and tomatoes, but some of my other favorite include broccoli, zucchini, green onions, and spinach.)
Garlic powder (1/4 tsp)
Olive oil (1/2 tbsp)
Cheese or nuts for protein (I used parmesan tonight, but pine nuts or pecans make good vegan substitutes.)
Salt
Pepper
1. Cook noodles according to package instructions.
2. While noodles are cooking, chop up any vegetables that need to be sliced.
3. Drain noodles.
4. Add all ingredients in a bowl and stir.
I made one of my favorite summertime dinners tonight: pasta primavera. It doesn't require standing over the stove (like stir fry or gumbo) and is a good cold dish when I'm not in the mood for a salad. Plus, it's very versatile and good when you need to toss together whatever veggies are in the fridge before they get old.
Pasta Primavera
Cook time: about 12 minutes (depends on the type of pasta you use)
Ingredients:
Whole what noodles
Vegetables (I used artichoke hearts, olives, and tomatoes, but some of my other favorite include broccoli, zucchini, green onions, and spinach.)
Garlic powder (1/4 tsp)
Olive oil (1/2 tbsp)
Cheese or nuts for protein (I used parmesan tonight, but pine nuts or pecans make good vegan substitutes.)
Salt
Pepper
1. Cook noodles according to package instructions.
2. While noodles are cooking, chop up any vegetables that need to be sliced.
3. Drain noodles.
4. Add all ingredients in a bowl and stir.
Thursday, September 15, 2011
Potato, Broccoli, and Veggie Patty Saute
This recipe is pretty versatile. You can use a different type of frozen vegetable and any type of veggie patty will do. Sometimes I use black bean patties, sometimes Boca burgers. I went with a Garden burger today. You can also add things like tomatoes, avocado, or cheese at the end. All you have to keep in mind is you have to put the ingredients in AT THE RIGHT TIME or you'll end up with uncooked potatoes, burnt garlic, or something else that might make it inedible. And use a bigger skillet than I did. Seriously, what was I thinking?
Potato, Broccoli, and Veggie Patty Saute
Prep time: As long as it takes to cut up a potato
Cook time: 20-30 mins
Ingredients:
Potato
Veggie Patty
Frozen Broccoli (handful)
Oil (1 tbsp)
Salt & Pepper
Garlic (1 or 2 cloves), optional
Onions, chopped (1/4 cup), optional
1. Get a large skillet--things will cook more quickly and evenly if everything lies flat--and start warming about a tablespoon of oil.
2. Cut a potato into home fry size slices (about 1/2" cubes). Put it in the oil and cook until the potato starts to look a little translucent. (Probably 15 minutes or so. I forgot to time it.) If you are adding onions and garlic go ahead and chop them up.
3. Make space for the veggie patty in the skillet. Follow the cooking instructions for the patty. If you are adding onions, add them now.
4. When everything is almost cooked, cut up the veggie patty with the spatula, then add frozen broccoli (and garlic). Put the lid on it and cook until the broccoli has had a chance to thaw and heat up. Add salt and pepper.
Tip:
-Potatoes are like the anti-salt. Salt them once or twice while frying them up to make sure they get salted more than the other ingredients.
Potato, Broccoli, and Veggie Patty Saute
Prep time: As long as it takes to cut up a potato
Cook time: 20-30 mins
Ingredients:
Potato
Veggie Patty
Frozen Broccoli (handful)
Oil (1 tbsp)
Salt & Pepper
Garlic (1 or 2 cloves), optional
Onions, chopped (1/4 cup), optional
1. Get a large skillet--things will cook more quickly and evenly if everything lies flat--and start warming about a tablespoon of oil.
2. Cut a potato into home fry size slices (about 1/2" cubes). Put it in the oil and cook until the potato starts to look a little translucent. (Probably 15 minutes or so. I forgot to time it.) If you are adding onions and garlic go ahead and chop them up.
3. Make space for the veggie patty in the skillet. Follow the cooking instructions for the patty. If you are adding onions, add them now.
4. When everything is almost cooked, cut up the veggie patty with the spatula, then add frozen broccoli (and garlic). Put the lid on it and cook until the broccoli has had a chance to thaw and heat up. Add salt and pepper.
Tip:
-Potatoes are like the anti-salt. Salt them once or twice while frying them up to make sure they get salted more than the other ingredients.
Thursday, September 8, 2011
Vegetable Satay
One-bowl lunch for 4 people (or 2 or 3 hungry people).
Vegetable Satay
Prep time (while boiling rice): 15 min
Cook time: 7 mins
Ingredients:
Minute rice (4 servings)
Frozen vegetables (4 cups)
Soy sauce (a lot)
Peanuts (optional)
Sauce:
Peanut butter (3 tbsp)
Lemon juice (1 tbsp/ 1/2 lemon)
Garlic powder (1 tbsp)
Dried chopped onion (1/2 tbsp)
Ginger, powdered (1/2 tsp)
1. Start boiling water for rice.
2. While rice is cooking, combine all the sauce ingredients in a bowl. Add about 5 tbsp of soy sauce--enough to give it a consistency like brownie batter.
3. Put the frozen vegetables in a skillet and start them warming. Once they've mostly thawed add satay sauce and any more soy sauce needed to get it liquid enough to coat the veggies. Keep cooking until everything is hot.
4. Scoop some rice into a bowl, put some veggies on top and add peanuts if you desire.
Tips:
-Put a lid on the pot when you boil water. It saves time and a little bit of electricity/ gas (depending on what your stove runs on) because it keeps the heat in the pot.
-Leftover satay sauce is pretty yummy on peanut butter and jelly sandwiches, especially with really sweet jelly.
Vegetable Satay
Prep time (while boiling rice): 15 min
Cook time: 7 mins
Ingredients:
Minute rice (4 servings)
Frozen vegetables (4 cups)
Soy sauce (a lot)
Peanuts (optional)
Sauce:
Peanut butter (3 tbsp)
Lemon juice (1 tbsp/ 1/2 lemon)
Garlic powder (1 tbsp)
Dried chopped onion (1/2 tbsp)
Ginger, powdered (1/2 tsp)
1. Start boiling water for rice.
2. While rice is cooking, combine all the sauce ingredients in a bowl. Add about 5 tbsp of soy sauce--enough to give it a consistency like brownie batter.
3. Put the frozen vegetables in a skillet and start them warming. Once they've mostly thawed add satay sauce and any more soy sauce needed to get it liquid enough to coat the veggies. Keep cooking until everything is hot.
4. Scoop some rice into a bowl, put some veggies on top and add peanuts if you desire.
Tips:
-Put a lid on the pot when you boil water. It saves time and a little bit of electricity/ gas (depending on what your stove runs on) because it keeps the heat in the pot.
-Leftover satay sauce is pretty yummy on peanut butter and jelly sandwiches, especially with really sweet jelly.
Sunday, September 4, 2011
Penne with Spinach, Cheese, and Nutmeg
I found my camera so I have pre- and post-oven pictures this week! Once I find the adapter for my phone's memory card I will have pictures of the last 2 recipes as well.
I made this recipe low-fat by using fat-free ricotta and fat-free mozzarella. Parmesan is already a pretty low-fat cheese. This calls for a food processor.
Penne with Spinach, Cheese, and Nutmeg
Prep time (includes boiling pasta): 17 min
Cooking Time (in oven): 8 min
Ingredients:
Penne (4 oz)
Spinach (couple handfuls)
Ricotta (3 oz)
Parmesan (2 tbsp)
Mozzarella, grated (1 1/2 oz)
Nutmeg (1/8 teaspoon)
Salt
Pepper
1. Boil pasta according to box directions.
2. While boiling pasta, put spinach, ricotta, 1 tbsp parmesan, 1 oz mozzarella, and nutmeg into food processor with a sprinkle of salt and pepper. Run until it's ground up.
3. Mix with pasta in a casserole dish then top with the rest of the paremesan and mozarella.
4. Stick into a toaster oven on 425 for 8 minutes or until cheese on top is melted.
5. Let it cool a minute or two before you eat it! You don't want to burn your tongue, plus the baked cheese on top forms a nice crispy layer.
Tips:
-If you don't have a food processor (I don't), use a blender on the lowest setting and add a little water so that it can blend. The water will cook out when you bake it.
-If you don't have a toaster oven, use a regular oven but increase the temperature to 450 and cooking time to 10 minutes. Also make sure to pre-heat.
-Do the cleanup while the dish is baking; it cuts down on your over-all time in the kitchen.
-Soak the casserole dish in water for a couple hours before washing. It will soften up any baked-on cheese.
I made this recipe low-fat by using fat-free ricotta and fat-free mozzarella. Parmesan is already a pretty low-fat cheese. This calls for a food processor.
Penne with Spinach, Cheese, and Nutmeg
Prep time (includes boiling pasta): 17 min
Cooking Time (in oven): 8 min
Ingredients:
Penne (4 oz)
Spinach (couple handfuls)
Ricotta (3 oz)
Parmesan (2 tbsp)
Mozzarella, grated (1 1/2 oz)
Nutmeg (1/8 teaspoon)
Salt
Pepper
1. Boil pasta according to box directions.
2. While boiling pasta, put spinach, ricotta, 1 tbsp parmesan, 1 oz mozzarella, and nutmeg into food processor with a sprinkle of salt and pepper. Run until it's ground up.
3. Mix with pasta in a casserole dish then top with the rest of the paremesan and mozarella.
4. Stick into a toaster oven on 425 for 8 minutes or until cheese on top is melted.
5. Let it cool a minute or two before you eat it! You don't want to burn your tongue, plus the baked cheese on top forms a nice crispy layer.
Tips:
-If you don't have a food processor (I don't), use a blender on the lowest setting and add a little water so that it can blend. The water will cook out when you bake it.
-If you don't have a toaster oven, use a regular oven but increase the temperature to 450 and cooking time to 10 minutes. Also make sure to pre-heat.
-Do the cleanup while the dish is baking; it cuts down on your over-all time in the kitchen.
-Soak the casserole dish in water for a couple hours before washing. It will soften up any baked-on cheese.
Friday, September 2, 2011
Black Bean Avocado Enchiladas
This recipe mostly comes out of cans, so all the seasoning is already done for you. You need a casserole dish, cake pan, or some sort of deep dish for this. I used 1&1/2 avocados and most of the can of beans for 8 enchiladas. Use whatever type of cheese you like best. I used cheddar jack.
Black Bean Avocado Enchiladas
Prep time: 20 minutes
Cook time: 6-7 mins
Ingredients:
Black beans, pre-seasoned (1 can)
Green enchilada sauce (1 can)
Avocado
Corn tortillas
Cheese, grated
1. Cut up the avocados lengthwise into slices about 1/2" thick. Remove skin.
2. Heat a tortilla in a skillet over medium heat for a few seconds each side. When it's warm use tongs to take it out. Put in a couple slices of avocado, a spoonful or 2 of beans, and a sprinkle of cheese, then roll. Continue until your casserole dish is full.
3. Pour enchilada sauce over the enchiladas then cover in cheese. (It's not Tex-Mex if it's not smothered in cheese.)
4. Cover with a lid or plastic wrap and microwave on medium heat until the cheese on top is melted, about 6 or 7 minutes.
Tips:
-You NEED to heat the tortillas. Cold tortillas will break when you try to roll them and then your filling will spill out and you will be sad.
-If you have an electric stove you can heat the tortilla directly on the burner but make sure the burner has warmed before you put the tortilla down or pieces of it will stick to the burner and it will come apart when you try to remove it.
-I heated each tortilla while filling and rolling the one before. Just stand next to the stove and watch to make sure you don't burn your tortilla.
-Place the overlapping side of the first enchilada against the side of the pan and the others against the previous enchilada. This way they will not unroll when you set them down and will not open at the bottom when you take them out the dish.
Black Bean Avocado Enchiladas
Prep time: 20 minutes
Cook time: 6-7 mins
Ingredients:
Black beans, pre-seasoned (1 can)
Green enchilada sauce (1 can)
Avocado
Corn tortillas
Cheese, grated
1. Cut up the avocados lengthwise into slices about 1/2" thick. Remove skin.
2. Heat a tortilla in a skillet over medium heat for a few seconds each side. When it's warm use tongs to take it out. Put in a couple slices of avocado, a spoonful or 2 of beans, and a sprinkle of cheese, then roll. Continue until your casserole dish is full.
3. Pour enchilada sauce over the enchiladas then cover in cheese. (It's not Tex-Mex if it's not smothered in cheese.)
4. Cover with a lid or plastic wrap and microwave on medium heat until the cheese on top is melted, about 6 or 7 minutes.
Tips:
-You NEED to heat the tortillas. Cold tortillas will break when you try to roll them and then your filling will spill out and you will be sad.
-If you have an electric stove you can heat the tortilla directly on the burner but make sure the burner has warmed before you put the tortilla down or pieces of it will stick to the burner and it will come apart when you try to remove it.
-I heated each tortilla while filling and rolling the one before. Just stand next to the stove and watch to make sure you don't burn your tortilla.
-Place the overlapping side of the first enchilada against the side of the pan and the others against the previous enchilada. This way they will not unroll when you set them down and will not open at the bottom when you take them out the dish.
Thursday, September 1, 2011
Watermelon Gazpacho
We have a huge watermelon in the fridge so I decided to make something with watermelon today. I made up a recipe instead of looking for one and made the mistake of putting in 2 cloves of garlic. It had a huge kick, even for me, so I changed the recipe to one clove. Also note that this recipe requires a blender.
Watermelon Gazpacho
Prep Time: 15-20 min
Cooking Time: 0 min
Ingredients:
Garlic (1 clove/ 1/2 tsp powdered)
Celery (1 stalk)
Sweet onions (3/4 cup chopped)
Cilantro (3 or 4 sprigs), optional
Lime juice (1/2 lime/ 1 tbsp)
Watermelon, seedless
Salt
1. Chop up the garlic, celery, onions, and cilantro. Don't worry about getting them into even pieces; they're going to get ground up in the blender, but it goes a lot more smoothly if the pieces are smaller. Run the blender on low to chop up the pieces some more.
2. Cut the watermelon up and toss it in the blender with the lime juice and a sprinkle or two of salt. Blend until it's mostly liquid.
Tips:
-I know I don't have an amount written for the watermelon. The one I used was about 8" in diameter and I cut 3 slices about 1" thick. I suggest putting it in a little at a time until it's as watermelon-y as you want.
-The reason you put the watermelon in after the other ingredients is that watermelon is much softer so it takes much less time to blend. Putting it in after everything else is mostly chopped leaves you a little bit of texture.
-I put mine in the fridge for an hour or so after making it to chill it, but you don't have to.
-Types of onions: The grocery store labels some onions as "sweet yellow". Look for Vidalia or 10/15 on the sticker if there isn't a sign.
Watermelon Gazpacho
Prep Time: 15-20 min
Cooking Time: 0 min
Ingredients:
Garlic (1 clove/ 1/2 tsp powdered)
Celery (1 stalk)
Sweet onions (3/4 cup chopped)
Cilantro (3 or 4 sprigs), optional
Lime juice (1/2 lime/ 1 tbsp)
Watermelon, seedless
Salt
1. Chop up the garlic, celery, onions, and cilantro. Don't worry about getting them into even pieces; they're going to get ground up in the blender, but it goes a lot more smoothly if the pieces are smaller. Run the blender on low to chop up the pieces some more.
2. Cut the watermelon up and toss it in the blender with the lime juice and a sprinkle or two of salt. Blend until it's mostly liquid.
Tips:
-I know I don't have an amount written for the watermelon. The one I used was about 8" in diameter and I cut 3 slices about 1" thick. I suggest putting it in a little at a time until it's as watermelon-y as you want.
-The reason you put the watermelon in after the other ingredients is that watermelon is much softer so it takes much less time to blend. Putting it in after everything else is mostly chopped leaves you a little bit of texture.
-I put mine in the fridge for an hour or so after making it to chill it, but you don't have to.
-Types of onions: The grocery store labels some onions as "sweet yellow". Look for Vidalia or 10/15 on the sticker if there isn't a sign.
Tuesday, August 30, 2011
Lower-Latitude Noodles (and a quick intro)
A quick intro: My name is Sarah, I grew up in Austin, and I generally like my food spicy. The ingredients I always have in my cabinets are garlic (fresh and powdered), red pepper flakes, cayenne, limes, cilantro, serrano peppers, comino (cumin), and olive oil. I don't measure or time stuff very carefully when I cook and I'm pretty sure I'd have died from salmonella by this point if I cooked meat. I hate doing dishes so I do one pot meals whenever possible. In other words, if you're lazy, cheap, and have better things to do than spend an entire afternoon prepping a meal but don't like eating out of a can you're gonna like my blog, even if you're an omnivore.
I'll start with a really simple recipe for my first post.
I made this up when my fridge was running a little empty since all this stuff's in my kitchen all the time. I call it Lower-Latitude Noodles because all the seasonings are stuff I keep on hand for Mexican food but the rice noodles and peanuts make it kind of Asian.
Prep time: 1 min
Cooking time: about 5 mins
Ingredients:
Rice noodles (a bowlful of cooked noodles)
Chili Powder (1/2 tbsp)
Garlic powder (2 tsp)
Cilantro (3 or 4 sprigs)
Lime juice (1 tbsp/ half a lime)
Peanuts (handful)
1. Cook the noodles according to the instructions on the packet.
2. Chop up the cilantro. Add it, the chilli powder, garlic, lime juice, and peanuts to the noodles. Stir and eat.
Tips:
NEVER use dried cilantro; it tastes like nothing. Fresh cilantro is cheap and spending 30 seconds to chop it is well worth the time.
Juicing a lime: Roll it on its side with a little bit of pressure to soften it and make it easier to juice. Stick a fork in it and rotate to break up the insides. It's a lot faster and gets more juice out than just squeezing with your hand.
I'll start with a really simple recipe for my first post.
I made this up when my fridge was running a little empty since all this stuff's in my kitchen all the time. I call it Lower-Latitude Noodles because all the seasonings are stuff I keep on hand for Mexican food but the rice noodles and peanuts make it kind of Asian.
Prep time: 1 min
Cooking time: about 5 mins
Ingredients:
Rice noodles (a bowlful of cooked noodles)
Chili Powder (1/2 tbsp)
Garlic powder (2 tsp)
Cilantro (3 or 4 sprigs)
Lime juice (1 tbsp/ half a lime)
Peanuts (handful)
1. Cook the noodles according to the instructions on the packet.
2. Chop up the cilantro. Add it, the chilli powder, garlic, lime juice, and peanuts to the noodles. Stir and eat.
Tips:
NEVER use dried cilantro; it tastes like nothing. Fresh cilantro is cheap and spending 30 seconds to chop it is well worth the time.
Juicing a lime: Roll it on its side with a little bit of pressure to soften it and make it easier to juice. Stick a fork in it and rotate to break up the insides. It's a lot faster and gets more juice out than just squeezing with your hand.
Subscribe to:
Posts (Atom)